


Integration of Email Infrastructure to all the employee owned devices has always been challenging in traditional MDM world, With Workspace one UEM you can achieve simply by pushing the MEM Profile to all the workspaceone enrolled devices.
I here by define the steps to configure the MEM profile for Office 365 and push it to all the Workspaceone managed / Enrolled devices.
Login to the WorkspaceONE Admin console and Navigate to Groups &Settings > All Settings > Email > configuration
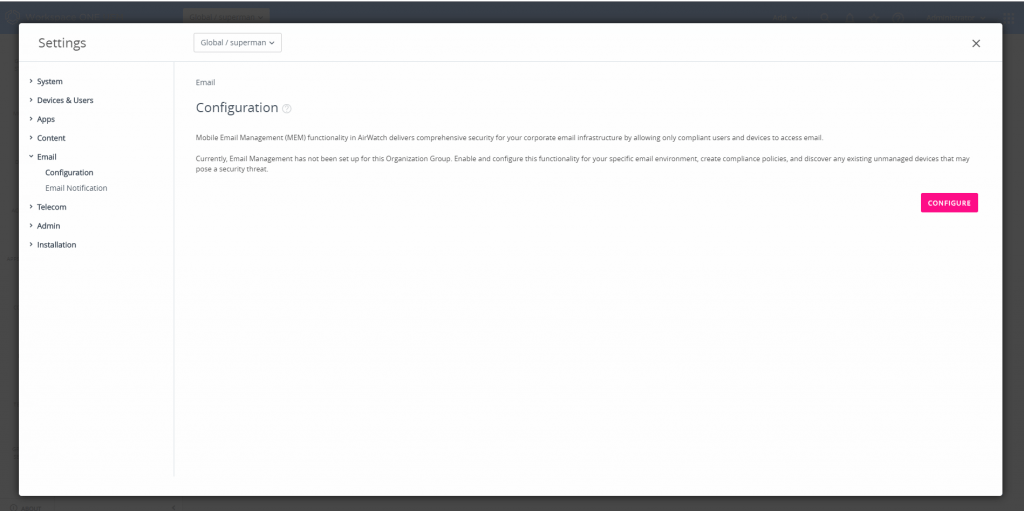
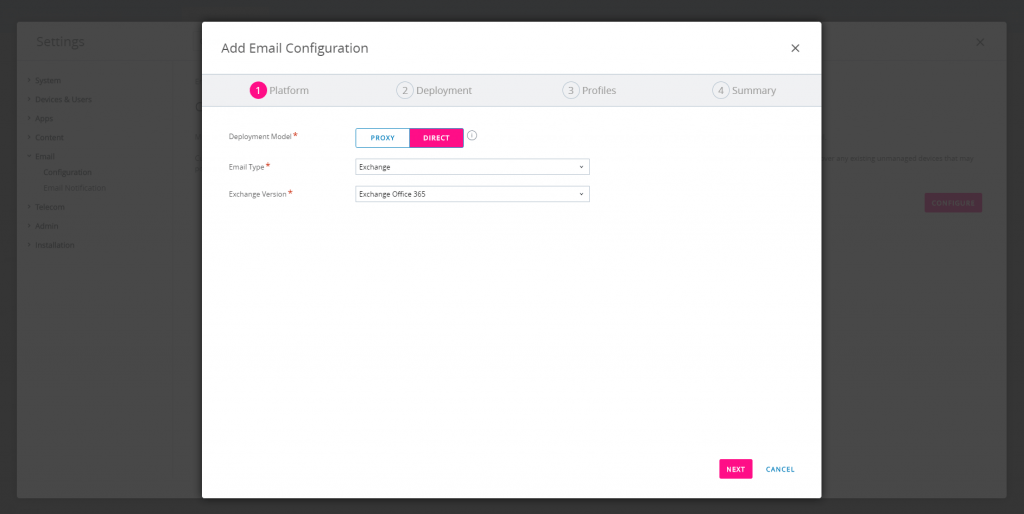
Click configure and you would get a pop out window to add the Email Configuration over it , Since we are gonna perform a direct Email deployment without a proxy we select the configuration as mentioned below and click next
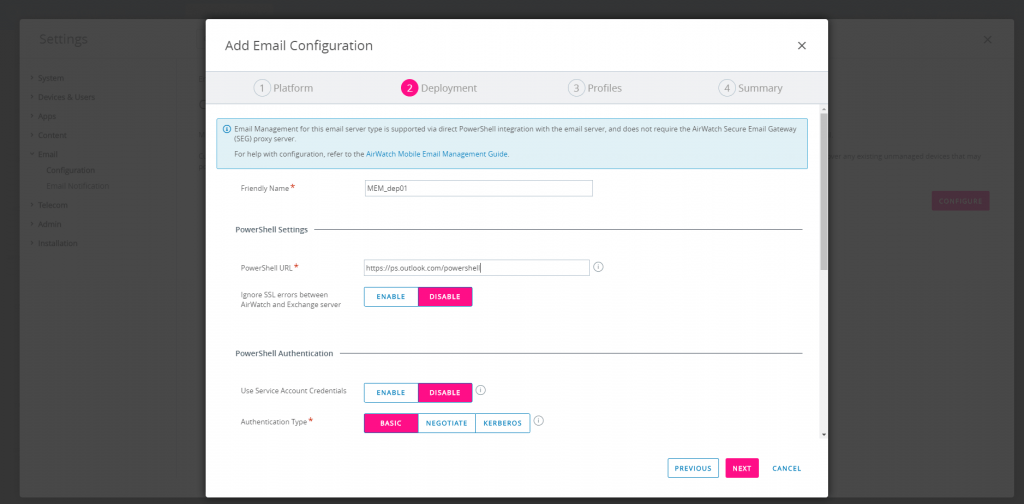
Now define the Friendly name if you want a customise the naming conventions else by default it would generate MEM_dep01 as a default friendly name.
Under the Powershell settings define the values which has been mentioned below, For office 365 we will using the powershell mode of connectivity.
- Powershell URL : https://ps.outlook.com/powershell
- Ignore SSL error between Airwatch and exchnage server : enable
- Use Service Account Credentials : Disable
- Authentication Type : Basic
- Admin username / Password : Provide your admin office 365 username and login credentials.
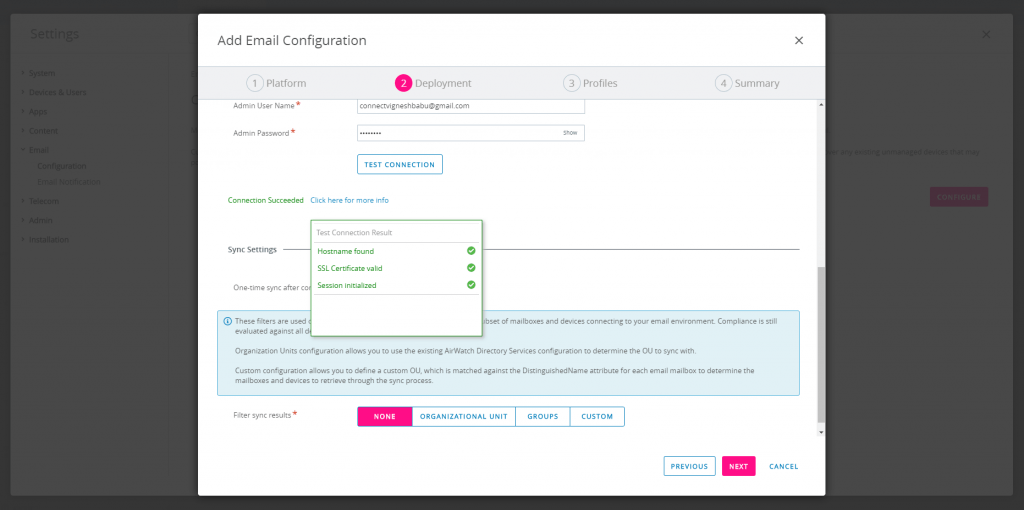
Note : Post making all the configuration changes, Click the Test Connection button and make sure there are no Errors displayed on the Test Connection and click Next.
Now we have to create profile to get it associated with the respective devices which are enrolled through WorkspaceONE. For demonstrative purpose i created profiles for Android and iOS devices as shown below.
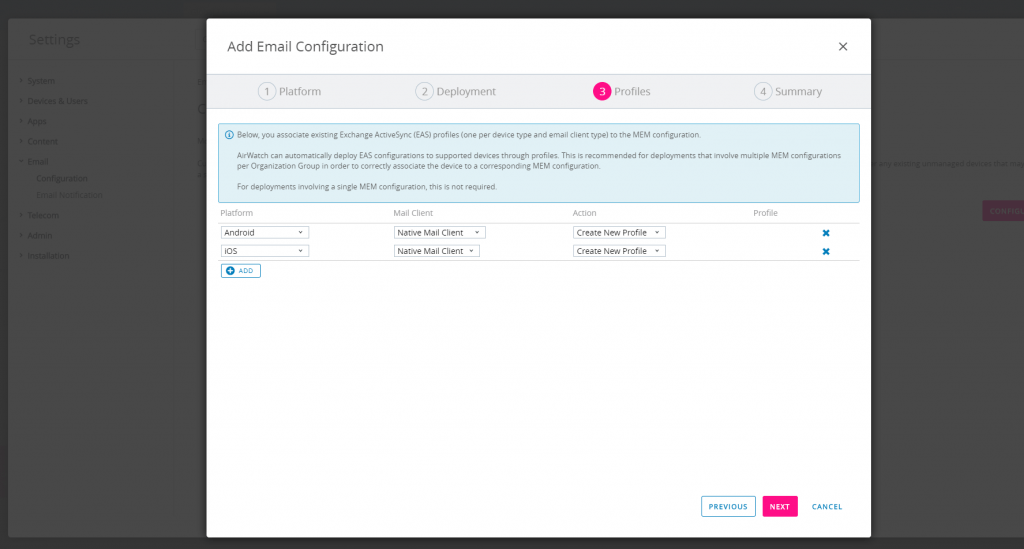
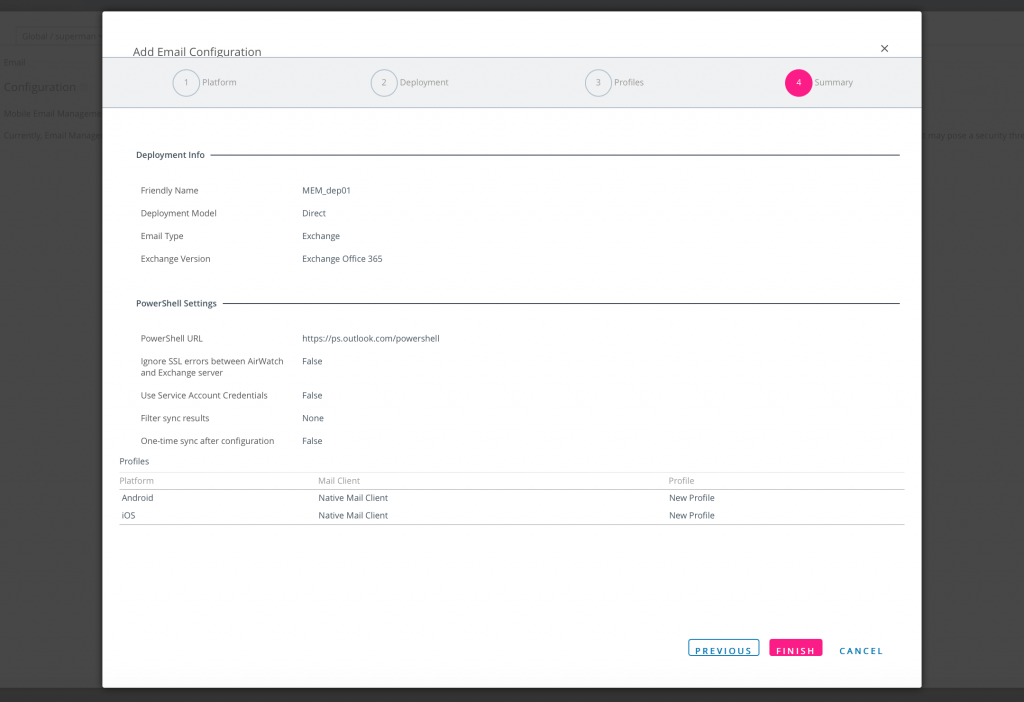
Click Next and you will enter into the Summary page, At this stage ensure all the settings and configurations made are correct and click finish to create the email configuration and auto create the MEM Profiles as well.
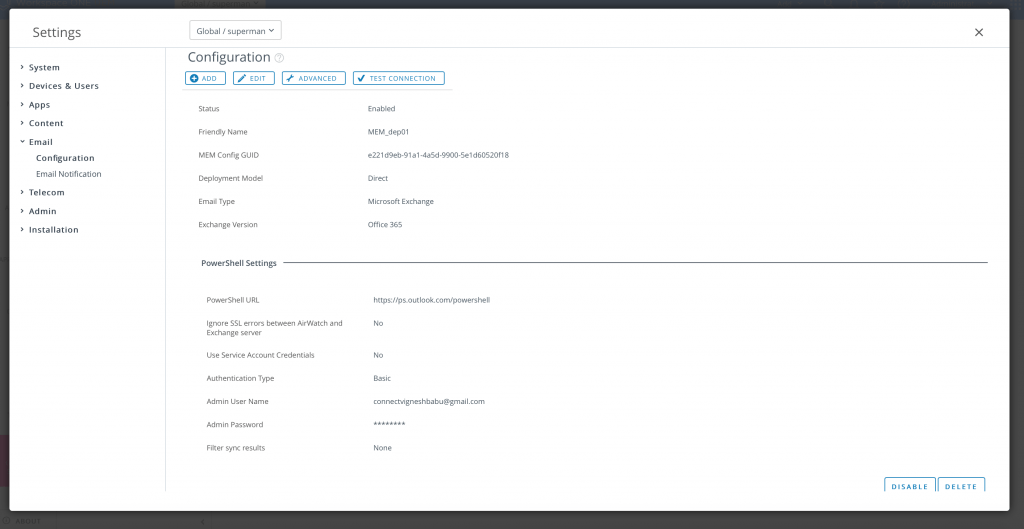
If all things go well, at the end you should be able to see the configuration as shown below:
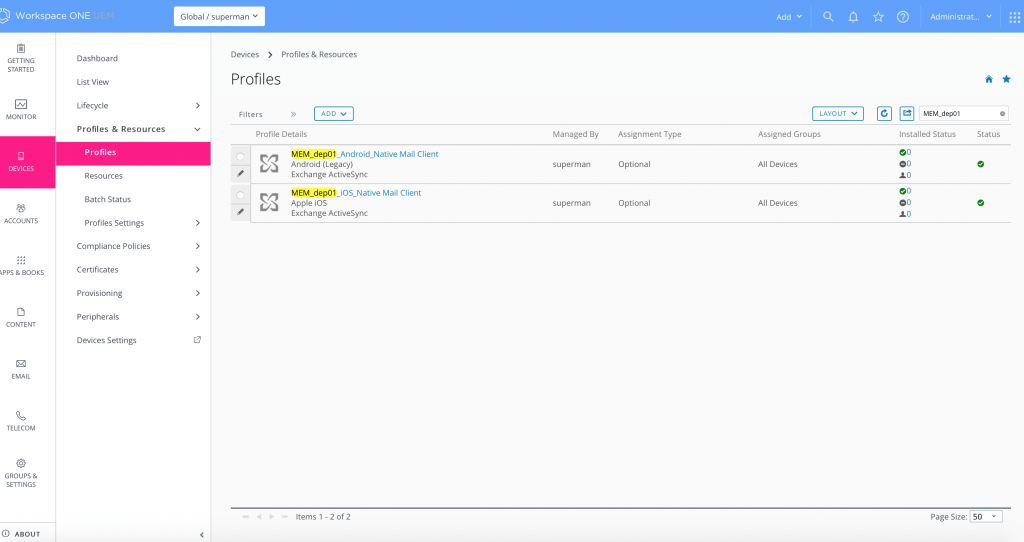
In Addition to this as mentioned on the above steps two MEM profile will be created automatically one for iOS and Another one for Android which will get deployed to the mobile endpoints holding the configuration details of the email server which will be configured on the endpoints.
You can check the created profile under the same OG by navigating to Devices > Profiles & Resources > Profiles.
Filter with the keyword MEM_dep01 these are the profiles with the MEM configurations which gets created automatically as we do and complete the Email configuration.
Hope this walkthrough will help you to configure office 365 with VMWare Workspace ONE UEM. Put you queries and comments below would be happy to reply back with the knowledge i posses.